This page is going to be a very long one initially since I want to document the building of my new observatory.
We moved to darker skies about 25 kilometres further east of Belgrave on about 6 acres of land in November 2009.
It's now the middle of june 2010 and after going through 'planning permit' exercises with the local council (this took 10 weeks), I now have permission to go ahead.
There are some provisos: I have to get a building permit from a local surveyor who insists that I get engineering computations for the design of the dome. I've gone through this stage now (which took a further 6 weeks) and submitted a treeful of paperwork to the surveyors\permit givers.
It's now mid winter 8 July and I had the electricians over to put cables into a 60 metre trench from the power box at the stables to the final destination at the observatory. As usual nothing went easily as it poured during excavations and of course the dirt from the trench turned to mud so it wouldn't go back into the very narrow trench using a tractor and grader blade. It just stuck on top without going in. I had to shovel this wet clay back by hand and of course it rained while I did it. The gound is so boggy that my boots must get 3 kilos of clay stuck to each one as I'm working.
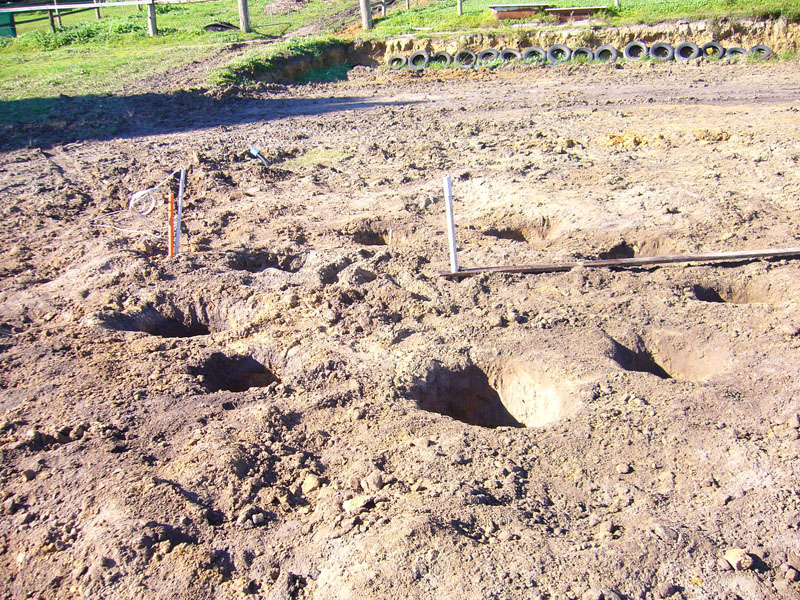
3rd July 2010: Hired a hand operated post hole auger and managed, very badly, to do 4 holes out of nine. Due to the location I have to put 1.5 metre concrete pillars into the gound to support the concrete pad which will form the floor. SOME BIG ADVICE for anyone doing as I am. DON'T do it by hand with a motorised auger, HIRE SOMEONE WITH A MACHINE. It's cheaper and less physically damaging, especially of you are working in clay.
Mid August. Because of all the rain it was not possible to get premixed concrete delivered to the site to form the pillars. I had the sand and stones dumped 100 metres away at the end of the driveway and then ferried the stuff by barrow and trailer down to the site.
I hired a concrete mixer and did it all by hand. It took me all day from 8am to 6pm but I did the 9 pillars. This was the only dry day for the month so I had to wait until mid September until I could level the ground properly and create the 'form work' for the concrete pad.
I used planks made from cement sheet as they would bend enough to form the circle for the pad, and set them into the ground and pegged them so there would be no movement when the concrete was poured. Using a bubble level I carefully made sure that all sides of the formwork were levelled, meanwhile the steel bending company U-Neek were delivering the steel for the frame. I used about 3/4cubic metres of packing sand over the ground to further flatten the ground under the pad and dug out a small trench just inside the perimiter. This is normal practice to anchor the pad with a slightly deeper vein of concrete.
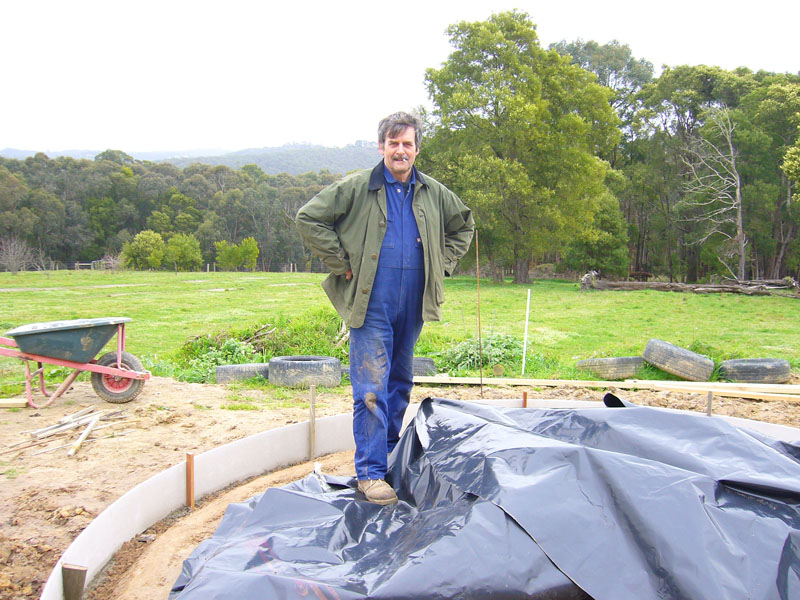
17 September and I've just put the plastic sheet over the packing sand with my father in law, Stuart, and we've placed the reinforcement into the pad area and placed plastic cups under the 'rio' to raise it to a level about 30mm under the intended surface.
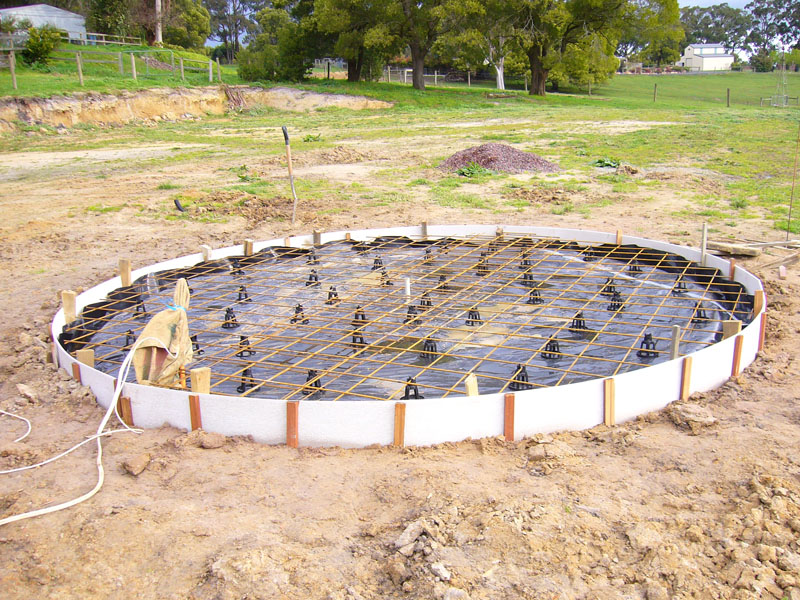
All that needs to be done now is to pout the concrete. I have a dilema though; that is goverened by cost and my eagerness to get on with it... do I buy crushed rock to make a roadway for the concrete truck or do I get it pumped down to the site at some expense.
I decided to by the crushed rock and have the tipper drop it on the intended roadway sa he backs over it. It turned out that this idea would be a bit cheaper and I'd have a roadway to boot, so I had the stuff delivered 4 days before the intended concrete pour. I had some mates organised to help during the pour and everything was set.
Well there's no accounting for the weather because it rained again and the tipper driver delivering the rock was unwilling to tip the rock where I wanted it as he had to go through a boggy area to get there. I had him tip it 100 metres away in a pile that is still there.
More to the point, I ordered 40-70mm rock and what I got was anything from 10mm to 200mm and as anyone who had dealt with these types of characters will know ... it's always your fault and they plead complete ignorance. Anyway I than had to backtrack and get the guy out with the concrete pump and time it with the concrete delivery 10am on the 21st of september.
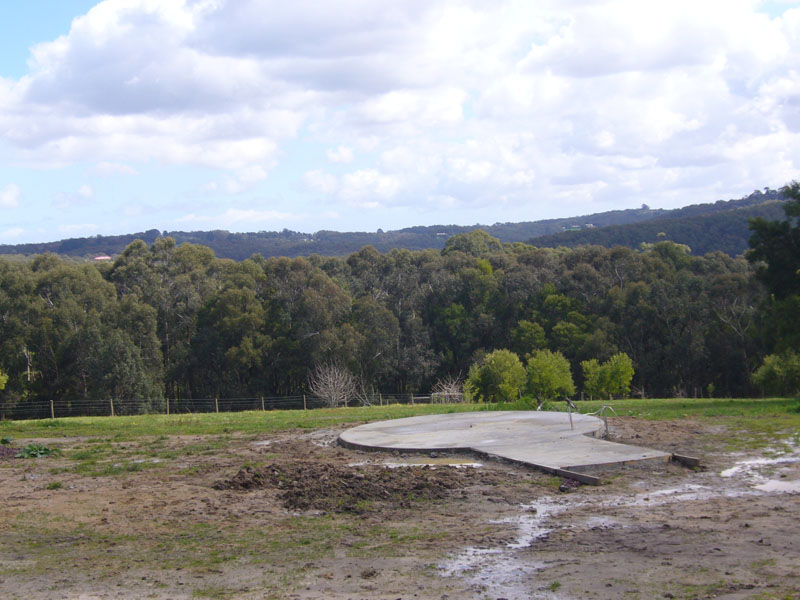
The big day arrived and ny mates turned up as did the concrete pump and we stood around for an hour till the concrete decided to show up. Now, from the day the rock arrived up to the day of the pour the weather was fine and the ground dried up beautifully, enough, on fact, to get a concrete truck right down to the site, but I'd already ordered the pump to come so I couldn't send him away. He positioned his machine 40metres from the dite and hooked up his hoses and then the concrete arrived. In 15 minutes it was in the formwork and my mates were screeding and levelling, we even had enough concrete left over to make an entrance pad.
They did as good a job screeding as amateurs can do without getting it level to the formwork. In fact the levl of the concrete rose a little toward the end, but only 5mm or so. The idea was to have a barbecue while the concrete set and then do the finishing.
During the barbecue it rained heavily and we had to cover the site with a tarp. Time wore on and they had to leave and I would finish the smoothing. By the time it had stopped raining and I had gone down to do the finishing the concrete was just getting too hard and it was a difficult job to smooth it over. At first I had success but as I worked the concrete it got harder and harder. In the end I resorted to using a yard broom to give it some texture and this now has an acceptable finish.
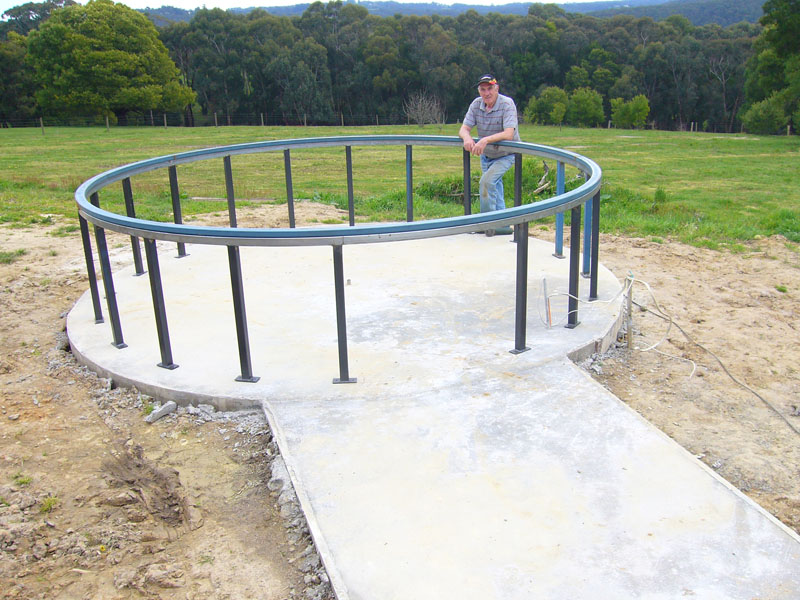
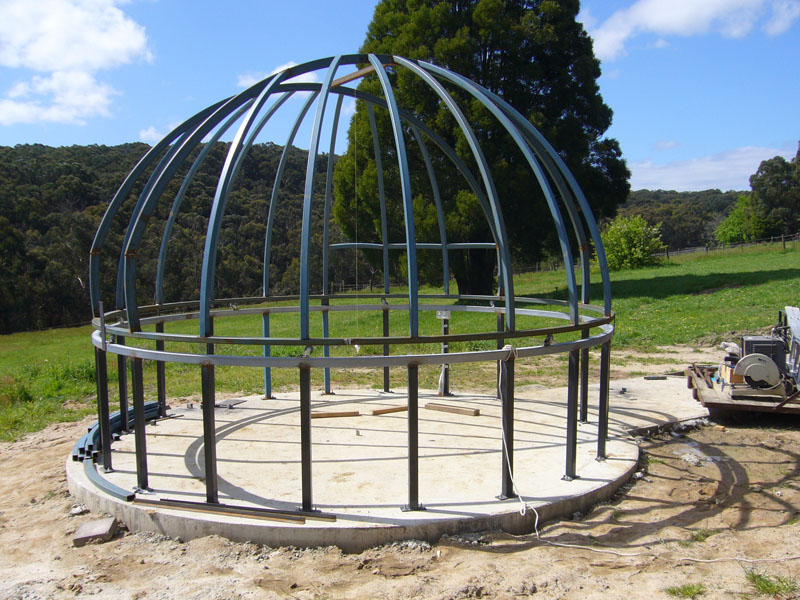
October 3rd, Stuart came and helped me lug the bottom part of the frame down to the site and place it. I drilled holes for the chembolts, using predrilled holes in the feet of the stanchions as guides. I wasn't game to do the next bit any other way as I feared that the holes and bolts would'nt match. I left the frame in place and glued through the stanchion feet and set the bolts in.
By October 10th I was able to level the frame by forcing some chem-glue under the feet that were slightly raised, due to my levelling activities, and letting it harden so as to create a solid footing. I tightened the nuts down soon after.
Oct 10th, Stuart came over and helped me to put the 2 door rails on but there is a problem. The engineer's drawings did not account for a radius smaller than that of the dome radius (since the rails are not at the top of the dome but about 300mm lower amd 1100mm apart) and consequently I had to cut a bit off the ends to make the rails fit neatly onto the horizontal circular beam. It means that I have to put vertical stanchions under the ends of the tracks to raise them a further 450mm or the telescope would not fit vertically under the dome.
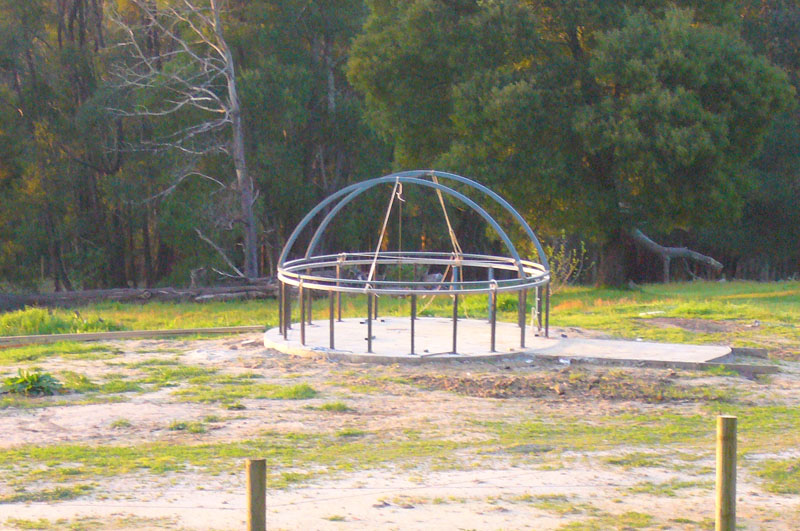
24th October and I had the weekend to raise the door track-rails by 450mm put the ribs in place.It doesn't look great because of the disparate curve
but when I put the door track over the rails and lay a skin over it, it will be OK. Something to be wary of when aligning the curved ribs.
There was a lot I didn't forsee, in particular; setting the ribs vertically. Even though measured correctly and marked out, it was difficult to get the cuts exact
so I used a plumbline. However, This proved to be unreliable because of the wind and also because I couldn't view from a distance. One has to get the line straight down the centre of the rib but there's always another rib in the way. Finally I used a large builder's square to get the ribs vertical before
welding. The engineer's design called for 'noggins' between the ribs about 450mm up. Since I had a lot of spare curved steel already I decided
to make them from these left overs, which has proved quite serendipitous for attaching the 'colourbond' skin to.
In fact, after the bending process the ribs seem to have sufferred a radial loss of width (about 3mm) so that instead of being 40mm square they are about 42 x 39mm, but his will not affect the construction in any way.
December 14th, see the photo below, the colourbond skin is almost complete. The design called for walls that were 0.55 mm thick and for the dome a thickness of 0.47 mm.
I could only obtain 0.55 x 1200 x 2400 sheets so while the walls were going to be easy to construct the dome would be altogether another matter. Firstly, the sheet lengths would not be long enough to cover each section but the 'serendipitous' noggins would allow me to cut shorter lengths and then use leftovers from the sheets to fill in the gaps at the bottom of the dome. This proved to be an excellent solution since the skin was very difficult to bend and fix down without making huge ripples. Anyway if the sheets were longer this problem would have been greatly exacerbated. As it was through November and December I was working alone and decided to make templates for each section so I could cut them off site. I would advise anyone attempting such a task to do this as the sections are not triangular but every edge is curved. Also templates will nullify any discrepancies in construction that tend to alter widths and lengths from original calculations. To make the templates I used and reused some clear polyethylene sheeting that I had and which was semi-rigid at about 0.5 mm thickness. By merely gaffer taping the sheet to cover a section then drawing around it with permanent marker and later transferring onto paper I was able to cut the colourbond skins from around the paper templates. To do this without burning the sheet I used a 1mm thick cuttoff wheel on a grinder.
Decenber 22nd, below is my solution when working alone to fasten the sheets and keep them as hard to the frame as possible I used a couple of tie-downs that truckies use to fasten their loads. This method was laborious on the dome as I had to keep adjusting the strap for every screw but it's well worth the effort.

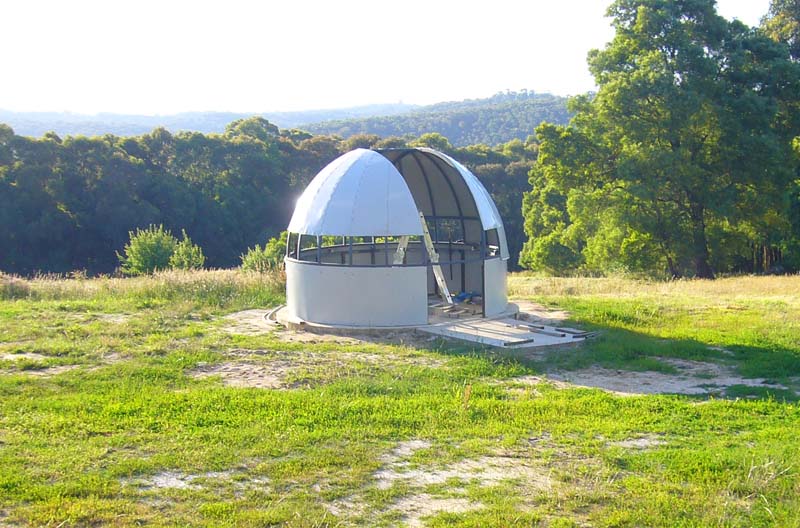
January 26th 2011 The observatory is finally finished but for some adjustments, like minimising friction between the dome and the walls.
I made the gap very small but some inconsistencies in the roundness of the dome's track bring about some wobble and some friction as a result.
I pushed out the dome walls with spacers where the walls touched and 'voila', rotation is as smooth as silk. The inside will be painted charcoal grey
to minimise reflection, especially from the computer sceens and I've had some angle iron bent to go onto the door rails as a 'keeper' to stop the door
lifting in high winds and also to stop rain from blowing in.
A couple of major jobs remain but only for operational convenience; motorize the dome to keep in step with the scope and motorize the
door.
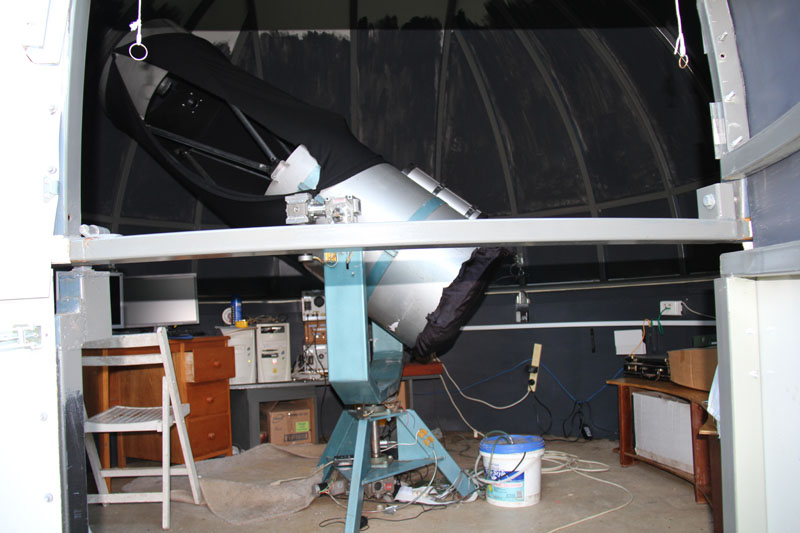
The picture below has the scope pointing 'home' which is actually the south celestial pole.... a good place to calibrate the scope from.
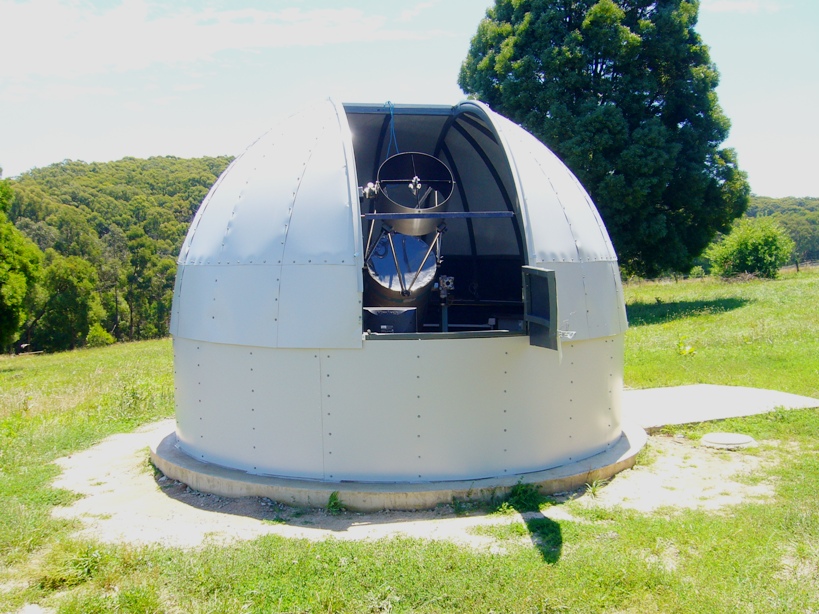
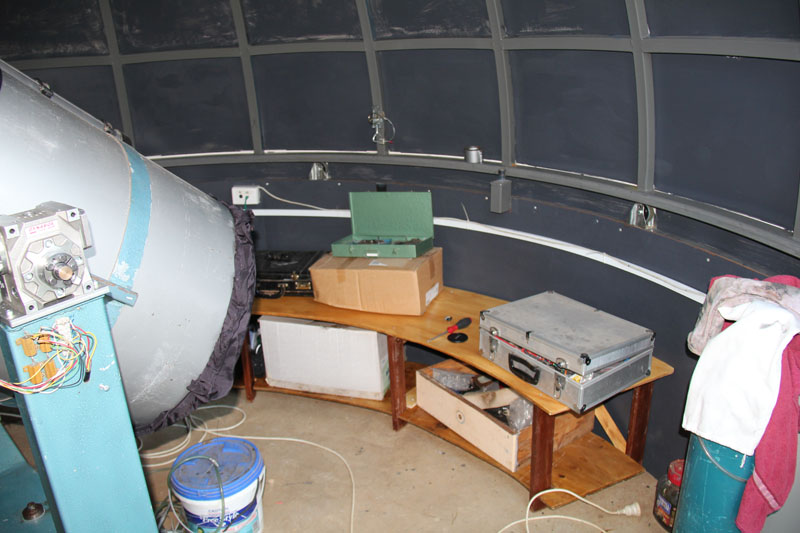
Mid March 2011: A lot of small jobs, now are underway such as painting inside the dome, callibration, collimation, improve tracking and finding, most probably I'll need to
put in an autoguider and I imaginer the electronics will need some changes. Stuart made a bench for me to tidy up my junk off the floor and so I can clamber out of the opening without disturbing the dome. The following picture is for Stuart to peruse his handiwork. It will also prove useful when
visitors come around and need somewhere to park. I made a bottom cover for the scope to block out light from the computers as it enters through the back of the mirror and affects the ccd camera. I might proudly say that I learned to use a sewing machine here in spite of breasking 3 needles. I guess an expert would have done in 5 minutes what took me 5 hours. I also noticed, here, that a slight breeze will affect the scope and blur some of the shots so I customised an old roller blind to deflect some of the wind: this has yet to be tested.
If the clouds give a break, then tonight I will mount a canon 550D DSLR camera on top of the spotting scope and attempt to get some long, wide field exposures.